DIY Car Repairs Which Auto Parts Are Easiest to Install Yourself
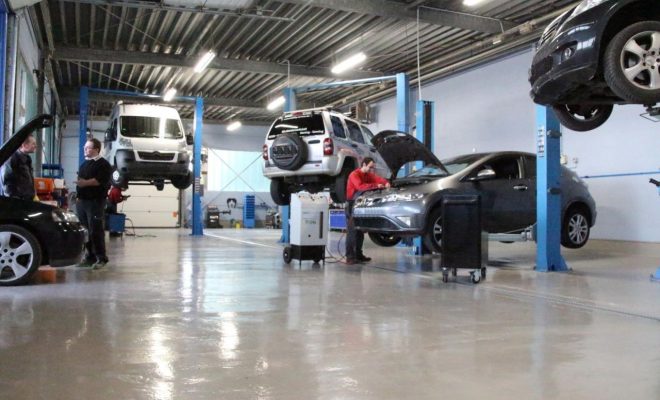
The cost of vehicle ownership extends far beyond the initial purchase price, monthly insurance premiums, and fuel expenses. Routine maintenance and unexpected mechanical repairs represent a significant ongoing financial commitment. When a vehicle components inevitably wear out, taking the car to a commercial dealership or an independent repair shop often results in a hefty bill, where professional labor charges frequently match or exceed the actual cost of the replacement parts.
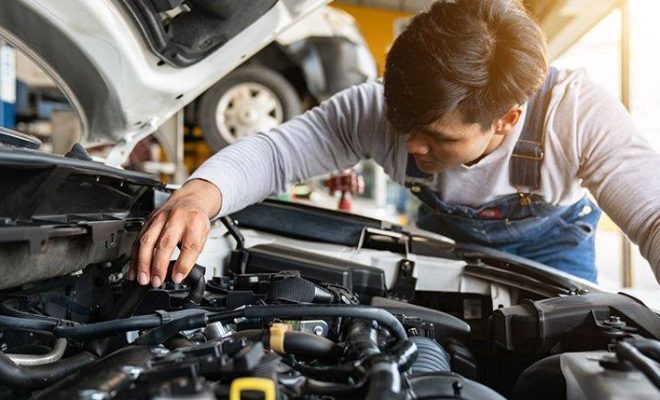
Fortunately, modern automobiles are modular in design. While certain complex systems like automatic transmissions, internal engine blocks, and intricate anti-lock braking networks require specialized diagnostic computers and decades of mechanical training, a substantial number of routine replacement tasks are surprisingly straightforward. Engaging in do-it-yourself car repairs is an excellent way to reclaim control over your maintenance budget, build deep mechanical self-reliance, and extend the operational lifespan of your vehicle. By understanding which auto parts are the easiest and safest to install yourself, you can confidently skip the repair shop for basic service intervals.
The Physical and Financial Benefits of DIY Maintenance
Stepping into the world of automotive self-repair offers immediate, measurable advantages. The most obvious benefit is financial. Professional automotive technicians typically command labor rates ranging from one hundred to over two hundred dollars per hour, often charging a flat-rate minimum even for tasks that take a fraction of that time to execute. By eliminating this labor premium, you only pay for the physical component itself.
Beyond the financial savings, performing your own basic automotive work provides peace of mind. When you personally replace a component, you possess absolute certainty regarding the quality of the part installed, the care taken during the installation process, and the structural integrity of the surrounding hardware. Furthermore, regular hands-on interaction with your vehicle allows you to spot minor anomalies, such as early fluid leaks, frayed serpentine belts, or corroded electrical wiring, before they escalate into catastrophic mechanical failures on the road.
Universal Safety and Preparation Protocols
Before attempting to replace any automotive component, establishing a safe and structured working environment is absolutely mandatory. Vehicles are heavy, complex machines operating under intense thermal and hydraulic pressure.
-
Work on a Level Surface: Always park the vehicle on a flat, solid concrete surface such as a garage floor or a level driveway. Never work on a vehicle parked on a slope, grass, or loose gravel.
-
Secure the Vehicle: Engage the emergency parking brake completely. If you must raise the vehicle using a hydraulic floor jack, always support the weight immediately with heavy-duty jack stands placed at the factory frame lift points. Never rely on a hydraulic jack alone to hold a vehicle up while working.
-
Disconnect the Power Source: For any repair involving electrical components or parts near moving engine accessories, disconnect the negative terminal of the car battery to prevent accidental short circuits or electrical shocks.
-
Wear Protective Gear: Always wear impact-resistant safety glasses to shield your eyes from falling rust, dirt, and chemical splashes. Utilize durable nitrile or mechanic gloves to protect your hands from scrapes, abrasive surfaces, and toxic automotive fluids.
Top Five Easiest Auto Parts to Install Yourself
The following components represent the lowest barrier to entry for aspiring DIY mechanics. They require minimal tool investments, pose low technical risk, and can generally be completed in under an hour.
1 Engine and Cabin Air Filters
Your vehicle utilizes two distinct air filtration systems. The engine air filter prevents dust, dirt, and airborne debris from entering the combustion cylinders, ensuring optimal fuel efficiency and preventing internal engine wear. The cabin air filter scrubs the air entering the interior ventilation system, removing pollen, dust mites, and exhaust odors from the passenger cabin.
Replacing these filters is the absolute easiest task in automotive maintenance. The engine air filter is housed in a plastic box located under the hood, usually secured by a few metal spring clips or standard Phillips screws. You simply pop the clips open, lift the cover, remove the old dirty filter, drop the new one into place ensuring it sits flush, and re-secure the housing. The cabin air filter is typically located directly behind or beneath the passenger-side glove compartment. Accessing it usually requires depressing a couple of plastic tabs to lower the glove box frame, sliding out the old filter tray, and sliding in the replacement. Pay close attention to the airflow direction arrows printed on the side of the filter frame during swapping.
2 Windshield Wiper Blades
Wiper blades are fabricated from soft rubber compounds that naturally degrade over time due to exposure to intense sunlight, freezing temperatures, and constant friction against road grit. Streaking, squeaking, or skipping across the glass indicates that replacement is overdue.
Many automotive shops charge an unnecessary labor fee to swap blades, yet the process requires absolutely no tools. Modern wiper arms utilize a universal hook or push-button mechanism. You simply pivot the wiper blade assembly away from the glass, depress the small plastic locking tab on the underside of the connector, and slide the old blade downward out of the arm hook. The new blade slides directly up into the hook until you hear a distinct, reassuring click indicating it is locked securely in place. To avoid accidentally cracking your windshield, never leave the bare metal wiper arm standing upright without a blade attached; if it snaps back down under spring tension, it can easily shatter the glass.
3 Exterior Light Bulbs
A burned-out headlight, taillight, or turn signal bulb is not just a safety hazard; it is a frequent reason for receiving a costly traffic citation. In the vast majority of vehicles, replacing these bulbs does not require removing the entire heavy light housing assembly.
Access to headlight bulbs is gained by opening the hood and reaching into the space directly behind the headlight assembly. You typically twist the plastic bulb socket one-quarter turn counterclockwise to unlock it from the reflector housing, pull the socket out, disconnect the wiring harness clip, and push the new bulb into place. For rear taillights, access panels are usually found inside the trunk lining directly behind the lights. A critical warning for halogen and high-intensity discharge bulbs: never touch the bare glass of the new bulb with your naked fingers. The natural oils on your skin will transfer to the glass, creating a localized hot spot when the bulb illuminates, which causes the glass to crack and fail prematurely. Always wear clean gloves or hold the bulb by its plastic base.
4 Battery and Terminal Connectors
Car batteries possess a predictable lifespan, typically failing every three to five years depending on local climate extremes and driving habits. If your vehicle cranks slowly or requires frequent jump-starts, the battery likely needs replacement.
To change a car battery, you only need a basic socket wrench set. Always disconnect the negative black cable first to prevent creating an accidental electrical arc if your wrench touches a metal part of the car body. Once the negative cable is safe, disconnect the positive red cable. Loosen and remove the metal tie-down bracket holding the heavy battery into its tray, lift the old unit straight out, and drop the new battery into place. Re-secure the tie-down bracket, then connect the cables in the exact reverse order: positive first, followed by the negative terminal. Clean any white powdery corrosion off the cable ends using a stiff wire brush and a mixture of baking soda and water before tightening them down.
5 Spark Plugs
While this task sounds intensely technical, replacing spark plugs on standard inline-four or inline-six engines is highly accessible for beginners. Spark plugs provide the vital electrical spark that ignites the fuel-air mixture inside the engine cylinders, and worn plugs lead to engine misfires, rough idling, and poor fuel economy.
On modern engines, the spark plugs are located directly on top of the engine valve cover, tucked beneath individual electronic ignition coils. Working one cylinder at a time to avoid mixing up the wiring layout, you unbolt the small screw holding the ignition coil down, pull the coil boot straight up, and insert a dedicated spark plug socket attached to a long socket extension down into the well. Turn counterclockwise to unthread the old plug, thread the new plug in carefully by hand first to avoid cross-threading the delicate aluminum cylinder head threads, and then tighten it securely using a torque wrench to the exact factory specification.
Frequently Asked Questions
What is cross threading, and how do I avoid it when installing parts?
Cross-threading occurs when a threaded fastener like a bolt or spark plug is inserted at a slight angle, forcing the hard metal threads to cut a new, incorrect path through the softer mating threads of the receiving hole. This permanently ruins the threads, making it impossible to tighten the part securely. To prevent this, always start threading any bolt, nut, or spark plug by hand using only your fingers for the first three to four complete turns. If you feel any physical resistance or binding immediately, back the fastener out, realign it perfectly straight, and try again.
Can replacing my own auto parts void my vehicle factory warranty?
No. In the United States, the Magnuson-Moss Warranty Act protects consumers by making it illegal for auto manufacturers to void a vehicle warranty simply because maintenance or repairs were performed by the owner rather than an authorized dealership. As long as the replacement parts used meet or exceed the factory specifications and the installation is done correctly without causing damage to surrounding components, your warranty remains fully intact.
How can I properly dispose of an old car battery after replacing it myself?
Car batteries contain highly toxic lead and corrosive sulfuric acid, making it strictly illegal to throw them into standard household trash or dump them in the environment. When you purchase a new battery, the retailer will charge a temporary fee known as a core charge. To get this money refunded, simply bring your old, spent battery back to the auto parts store. The retailer will collect it safely and send it to a specialized industrial recycling facility where the lead and plastic components are melted down and reused.
What is the difference between OEM and aftermarket auto parts?
Original Equipment Manufacturer, or OEM, parts are fabricated by the exact same company that built the components when your vehicle rolled off the assembly line, ensuring perfect factory fit and identical performance. Aftermarket parts are produced by independent third-party companies. Some aftermarket options are budget-focused and lower in quality, while other premium aftermarket brands specifically re-engineer parts to fix known factory flaws, often offering superior durability compared to the original factory components.
Should I replace all four spark plugs if only one of them is failing?
Yes. Spark plugs operate under identical thermal stresses and undergo the exact same number of electrical ignition cycles over time. If one spark plug has worn down to the point of structural failure or electrical degradation, it is a definitive statistical indicator that the remaining plugs are nearing the end of their functional lifespan as well. Replacing them as a complete, matching set ensures smooth engine performance and even combustion across all engine cylinders.
How do I know if an exterior bulb is burned out or if it is a blown fuse?
If a single light bulb fails to illuminate while the matching bulb on the opposite side of the vehicle continues to function perfectly, the issue is almost certainly a burned-out bulb filament. However, if an entire circuit of lights simultaneously stops functioning, such as both high-beam headlights or all interior dashboard lights, the problem is likely a blown electrical fuse or a faulty relay. You can check your owner manual to locate the vehicle fuse box and inspect the clear plastic fuse body to see if the internal metal wire strip has melted and broken apart.